 ELXR
Curves manual
Written for version 1.1.2.
Curves is a volume shaper: you draw one cycle of volume movement and it repeats in time with Live, for sidechain-style pumping, ducking and trance gates without a compressor or any routing. The whole shape is on the device.
On the compact device, click Swing or Smooth and type a value, then press Enter. In the Expand window, drag those sliders.
Quick start
- Put Curves on the track you want to pump: a bass, pad or chord track, after the instrument.
- Press play. It loads on the Pump preset at 1/4, so it ducks on every beat straight away, in time with Live.
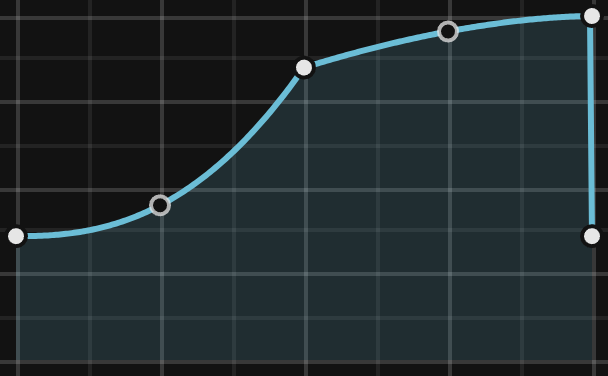
- Drag the points to change how deep the dip goes and how fast the sound comes back. Drag the hollow handle between two points to bend the line.
- Turn Depth down for a gentler pump. Turn Smooth up if you hear clicks on sharp shapes.
- For a ready-made shape, click the small black presets button (right of the tool buttons) and pick one.
Drawing the shape
The graph shows one cycle of the volume: the top is full volume, the bottom is silence. The shape repeats every cycle.
- Add a point: click an empty spot.
- Move a point: drag it. Points snap to the grid. Hold Option (Alt on Windows) to move it freely up and down, Cmd (Ctrl on Windows) to move it freely left and right, both for fully free.
- Bend a line: drag the hollow handle between two points; the line follows the mouse. Hold Shift for fine bending. Double-click a handle to make the line straight again.
- Delete a point: double-click it. The first and last points stay and share the same height. A vertical step just before the end can still make an abrupt transition; use Smooth to soften it.
- The points show the shape you drew. At full Depth, the blue line includes Swing and Smooth. Display limitation: below full Depth, the blue line and its playhead dot move down even though the actual volume dips become shallower. At Depth 0 the audio is unaffected, even if the blue line sits at the bottom. Use the Depth value and your ears to judge the amount.
Block, Draw and Clean
The small buttons under the graph, from the left: Block, Draw, Clean, the grid button and Expand. Block and Draw are highlighted when they are on; with both off you edit points as above.
- Block: click or drag in the graph to fill whole grid columns at the height you click. Quick for trance gates.
- Draw: drag freehand over the shape. It is tidied into a few points (two per grid column, straight stretches merged), so it stays easy to edit.
- Clean (works in any mode): each click removes about a third of the removable points and re-fits the curves to approximate the shape. Listen after cleaning a detailed curve. Steps and the first and last points are kept.
Grid and Snap
The grid button shows the grid size and opens a small card over the graph:
- Snap: points snap to the grid (on by default).
- Grid: columns x rows, each 1 to 16 (8 x 8 by default). Drag a number up or down (Shift for fine steps); double-click it for 8.
Click outside the card, or the grid button again, to close it.
Rate, Swing, Smooth and Depth
| Control | What it does |
|---|---|
| Rate type | The menu above the Rate dial. Notes: straight notes. Triplet: triplet notes. Dotted: dotted notes. |
| Rate | The length of one cycle, synced to Live's tempo and transport. Notes: 8 Bars, 4 Bars, 2 Bars, 1 Bar, 1/2, 1/4 (default), 1/8, 1/16, 1/32, 1/64. Triplet: 1/1 T to 1/32 T. Dotted: 1/1 D to 1/32 D. |
| Swing | 0 to 100 %. Delays every second grid column within each pair for a shuffle feel. Use an even number of columns for regular pairs; with 8 columns it swings eighths of the cycle. |
| Smooth | 0 to 100 %. Rounds sharp jumps and corners to reduce clicks while retaining the drawn volume range. 0 % is the sharpest setting, with a small amount of smoothing still active in the audio engine. The result depends on Rate and tempo; at fast Rates, higher settings can reach the same maximum rounding. Listen to sharp attacks as you adjust it. |
| Depth | 0 to 100 %. How much of the shape is applied. 100 % is the full movement; lower values keep the same shape but move the volume less; 0 % is no effect. |
Outside 4/4: the setting labelled 1 Bar lasts four quarter-note beats. It does not shorten to a three-beat bar in 3/4. Check the cycle against your arrangement when working in another time signature.
Presets
Click the black presets button (it shows a small picture of the current shape). The list opens over the graph: folders on the left, the presets of the folder you point at on the right, each with a picture of its curve. Click a name to load it; click anywhere else to close.
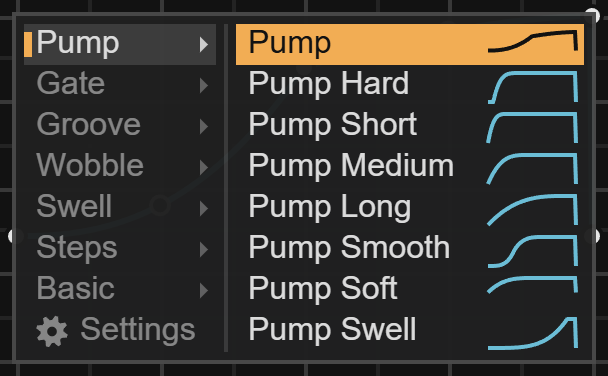
- 45 presets in 7 folders: Pump (8), Gate (8), Groove (6), Wobble (6), Swell (6), Steps (5) and Basic (6).
- Each preset also selects Notes Rate and its intended grid columns. Pump and Basic presets, Offbeat Pump and Pluck use 1/4; Double Pump uses 1/2; the others select 1 Bar. The grid has 8, 12 or 16 columns depending on the preset. Check Rate after loading a preset if you want to keep your previous rhythm.
- After you pick a preset, the arrow keys step through all of them (Up or Left: previous, Down or Right: next) and the name shows for a moment in the graph. The presets button has a yellow outline while the arrow keys are active. Clicking in the graph, moving another control, changing Live's selected parameter, track or device, or leaving the device's focus turns them off. Check that the outline has gone before using the arrows for another task.
- To keep your own shapes, save a Live device preset or your Live Set: the shape is saved with them.
The waveform
The graph collects input peaks over one cycle, using the louder of the left and right channels. The faint layer shows those stored input peaks. The brighter layer predicts their level after the current shape, Depth, Swing and Smooth; it is not a recording of the final output. It changes as soon as you edit, including while playback is stopped, using the peaks already captured.
The display rescales for readability, so it is not an output-level or clipping meter. Let a cycle play to refresh it after changing the sound. The vertical playhead shows the current position in the cycle. Curves does not listen to a separate kick input: align the dip with your arrangement by ear.
Settings
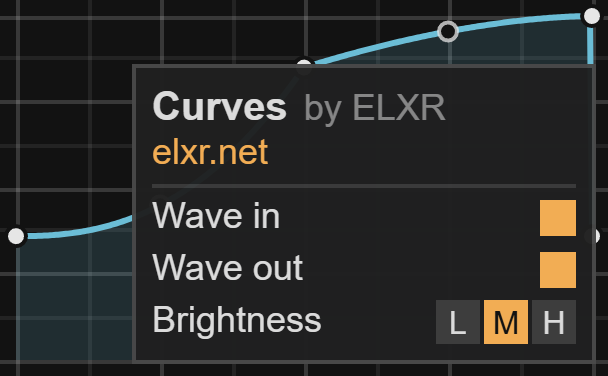
At the bottom of the folder column in the preset list is Settings (with a gear). It opens a small card over the graph:
- elxr.net: opens the ELXR website.
- Wave in and Wave out: show or hide the captured input and predicted shaped waveform (both on by default).
- Brightness: L, M (default) or H, for the waveform.
Click anywhere else in the graph to close it.
The Expand window
The Expand button (far right of the tool buttons) opens a larger editor in its own window, with all the controls: Rate type and Rate, Block, Draw, Clean, Snap, the grid size, Presets, Swing and Smooth, Depth and a gear for Settings. Edit in either one; both stay in step. In the window, Swing and Smooth are sliders: drag them (Shift for fine), double-click for 0 %.
Good to know
- Curves has no added audio-path delay and processes stereo in, stereo out. Both channels receive the same volume curve; the envelope is smoothed around sharp transitions.
- It follows Live's tempo and transport, so it needs no sidechain input and keeps pumping when the kick is muted.
- Stopping playback holds the curve at the stopped position; it does not automatically restore full volume. If an instrument becomes quiet or silent while you play with transport stopped, set Depth to 0 or bypass Curves, then restore your setting before playback.
- The shape, grid, Rate, Swing, Smooth, Depth and the display settings are saved with your Live Set and with device presets. Rate, Swing, Smooth and Depth can be automated.
- Inspired by Xfer's LFO Tool; not affiliated with Xfer Records.
Install
Drop Curves.amxd on an audio track, or save it into your User Library (Presets / Audio Effects / Max Audio Effect). Needs Ableton Live with Max for Live, on Mac or Windows. Questions: [email protected].